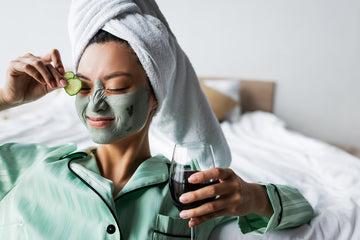
Let’s be real—nothing ruins a good skincare video faster than bad lighting. You’ve spent time prepping your skin, your products are lined up like tiny soldiers of hydration and glow, and then… the video turns out dull, shadowy, or (worst of all) yellow. Suddenly, your “dewy skin” looks greasy and your “radiant serum” is nowhere to be seen.
If you’re creating skincare content—whether you're a seasoned creator, a budding beauty enthusiast, or just someone who loves documenting their skin journey—lighting can make or break your video. And no, you don’t need a full studio setup or a ring light the size of a hula hoop. You just need to know a few tricks of the trade (and maybe a tiny gadget or two).
So, let’s get into five practical, beginner-friendly lighting tips that’ll take your skincare videos from meh to mesmerizing.
💡 1. Know Your Natural Light—and Use It Wisely
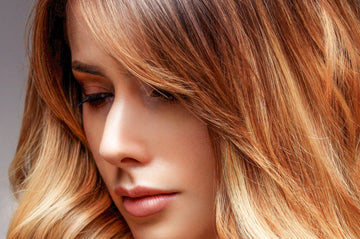
Let’s start with the OG: sunlight. Natural lighting is your best friend for showing off skin texture, glow, and the real-life results of your skincare routine. But there’s a catch: not all daylight is good daylight.
Here’s what to aim for:
Soft, diffused light: Think of a cloudy day or sitting next to a window with a sheer curtain. This minimizes harsh shadows and gives a smooth, even glow.
Golden hours: That dreamy light just after sunrise or before sunset is magic for your skin (and pretty much everything else).
Face the light: Always position yourself so the light is in front of you, not behind. Backlighting can cast your face into shadows.
Pro tip: If your room gets great morning light, schedule your filming then—even if it means sipping coffee with a face mask on.

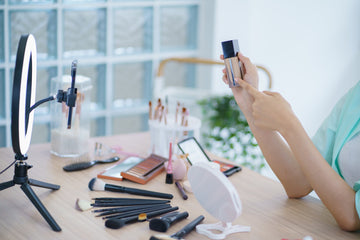
💡 2. Invest in a Ring Light (but Make It the Right One)
Ring lights are everywhere—and for good reason. They create an even circle of light that reduces shadows, brings out facial features, and adds that subtle catchlight in the eyes that makes everything look more alive.
But here’s what most people overlook: not all ring lights are created equal.
Look for these features:
Adjustable brightness & color temperature – So you can go from cool to warm tones depending on your vibe and time of day.
Stable base or phone holder – No one wants a wobbling setup halfway through their cleansing demo.
One great option is the LED Ring Light from our collection. It’s compact, easy to adjust, and gives you that pro-level glow without taking over your entire desk. Bonus: it’s perfect for makeup tutorials, too.
💡 3. Avoid Overhead Lighting (a.k.a. The Skin Saboteur)
We all have that one room in the house with overhead fluorescent lights that make everyone look slightly… green. These lights can cast shadows under your eyes and chin, emphasizing texture and dulling your skin’s natural radiance.
To fix this:
Turn off overhead lights when filming.
Use front-facing light sources like lamps, windows, or your ring light.
If needed, add a soft side light (like a small desk lamp with a white shade) to balance it out.
Remember, you’re showing off your skincare results, not recreating a horror movie set.
💡 4. Use Reflective Surfaces to Your Advantage
Even if you don’t have a bunch of fancy lights, you can get creative with what you already own. Reflective surfaces—like mirrors, whiteboards, or even a sheet of white paper—can bounce light back onto your face and soften shadows.
Try this:
Place a white foam board or pillowcase just under your chin, out of frame.
Use a portable mirror, like the Interactive LED Mirror with Touch-Screen Technology, to both apply your products and subtly reflect light back onto your face.
Bonus: the built-in LED on that mirror gives you extra illumination without needing a full light setup. It’s the multitasking sidekick every beauty content creator needs.

💡 5. Keep Your Camera Angle and Light Source Aligned
This might sound simple, but it’s a game-changer: make sure your light is coming from the same direction as your camera.
If your light is off to the side or too far above, it can create unflattering shadows or make parts of your face look unevenly lit. You want your skin to look like it’s glowing evenly, especially when you're doing close-ups of application techniques or product textures.
Whether you're using your phone, a compact camera, or a vlogging setup, try aligning your light directly behind or around your camera lens.
🌟 Bonus Tip: Let Your Skin Do the Talking
While lighting is crucial, don’t forget the real star of your skincare videos: your skin! Be kind to yourself, don’t stress over small imperfections, and remember that authenticity always resonates more than perfection.
Use lighting to support your story—not to filter it out.
✨ Final Thoughts: Glow Beyond the Lens
At the end of the day, lighting is just another tool in your storytelling toolbox. The real magic happens when you pair it with honest tips, thoughtful routines, and your unique voice. Whether you're documenting your skin transformation, reviewing new products, or just chatting through your nighttime routine—good lighting helps your message shine.
You don’t need a studio. You don’t need to be an expert. You just need a window, a light (or two), and a willingness to show up—glow and all.
So next time you hit “record,” take a moment to set the light just right. Because when the lighting is good, your confidence shines through—and that’s the real beauty of it.